How To Carve Animals Out Of Wood

Welcome to my guide on how to carve animals out of wood. I hope you learn something new here !
Wood carving is a unique and valuable passion as well as a hobby that could turn out to be profitable as a money making venture done in your spare time from your home.
It is a rare art and only a few people get past to the initial stage to learning wood carving. Overall, it is not an easy job to carve objects out of wood. Before I start, keep in mind that effective wood carving requires consistent practice and a lot of time.
Following is the ultimate step-by-step guide to carving animals out of wood.
How Would You Want to Carve Animals ?
Well, there are generally four types of wood carving i.e. whittling, carving in the round, relief carving, and chip carving. We are talking about whittling here as it is the most unique yet simplest carving type.
Selecting the Wood Type
After you have determined the type of carving, the next step is to choose an optimal wood. Instead of getting the wood from a lumber pile, it is recommended to buy a high-grade purchase labeled wood from the craft store – specifically for wood carving.
Selecting the Best Carving Knife for Whittling
Efficient grip, sharp, and rigid are some common characteristics of a carving knife. When it comes to whittling, chip knives are the best option. Chip knives, V-Tool, and a small chisel is an ideal choice for beginners looking forward to carving animals out of wood. The blade in these knives are somewhat 1.5-2.5 inches long and can be handled easily. A carbon steel blade is preferred for long-term use.
Practice Prior to Starting the Project
If you’re a beginner, practice by making few basic cuts to get a clearer idea of nature of the wood and blade. Make sure to use the same tools you will be using for the wood carving when practicing. Hold the knife correctly and get a hold of the wood with your non-dominant hand.
Carving Animals Out of Wood
Carving animals out of wood is a lot easier than most woods crafted designs. Obviously, one cannot get a 100% idea or expertise to craft the exact structure just by reading this guide. But the below step-by-step guide on how to carve animals out of wood will certainly help you a lot…
• Determine the picture of the animal you want to carve out of the wooden block
• Use a graphite to trace the front of the picture on the wood
• Remove the wood from unnecessary surface i.e. between legs and tail
• Cut the whole wood piece into a basic shape. In simple words, remove as much as you can to form a simple shape of the carved animal
• After this, use lager knives and u-gouges and work on the sketched form to give it a more realistic look.
• Complete the process by adding fine details using small knives. You can give a more realistic look to the animal’s hair, eyes, tail etc.
When carving, you don’t need to be afraid of ruining the design if you carve outside the sketched design. After you have carved your desired final piece, you can protect and enhance the final piece using paste wax, Danish oil, and / or wood sprays.
Now we will go into the details of carving specific animals from wood, starting with a dog…
How To Carve A Dog Out Of Wood
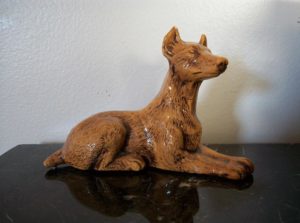
Are you a DIY enthusiast and interested in wood carving ?
Well, wood carving, especially whittling, is almost too much fun to be considered legal. 🙂 Wood carving is a unique skill and only a few people end up mastering it.
The best thing is that you just need a piece of wood and a wood-carving knife to start a simple wooden craft. As this article talks about how to carve a dog out of wood, let’s get straight to the point.
Carving dogs out of wood is so much fun as well as the best way to master your wood carving skills. First, make sure you have all the material needed to start carving.
Material Required
Following is the list of all necessary things required to carve a wooden dog :
• The right type of wood. Butternut, Basswood, and white pine are considered the best wood types. They are relatively and can carve into a fine art piece. You can get them at any craft store.
• Choose a rigid, sharp, and easy to grip knife for the best results. Get a chip carving knife and u-gouges. Knives with carbon steel blade are preferred for long-term use. Chisels are also needed for wood chipping.
• Furthermore, you may want to use paste wax, Danish oil, or wood spray to finalize the carved dog. However, they are optional.
Carving a Dog Out of Wood
You must take it slow and consistent as wood carving is a meditative and relaxing activity. Rushing into the job can cause accidents and ruin the subject. Following is the step-by-step guide to carving a dog out of wood
1. Plan and Outline the Model
The very first step is to finalize the dog you will be carving. Determine the dog breed and take a picture. Though you can always start carving with the picture, it is recommended to make an initial model with self-hardening clay. This will help you to carve with the same design and size.
2. Carve the Initial Block
Now transfer the outline measurements to the wooden block using a pencil. You can also use a try square to make more accurate measurements. After this, try to carve the block as much as you can. In case of dogs, it is recommended to start with the dog face. However, make sure to stay out of the dog outline.
3. Secure the Wooden Design
For better results, it is recommended to clamp the wooden piece or on the table. It will free both of your hands and you can have a better grip on the wooden piece. Note that you should not carve while keeping the wood in your lap.
4. Final Shape
In the end, switch the smaller knives and tools to add details to the masterpiece. Always use sharp tools at this stage because dull tools can ruin the shape of the dog. Add final details critical parts like legs, ears, and face.
Though the wooden dog is already completed, you can still refine the finished piece using certain paste wax, wood spray, or Danish oil. It will enhance the finished piece and take out the natural color of the wood.
How To Carve A Cat From Wood
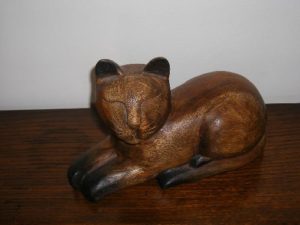
Carving a cat out of wood is certainly a unique do-it-yourself woodcarving project. To be honest, carving a cat from wood is a lot easier than most of the animals. A cat is one of the few animals with minimalist body structure. Note that we will talk about whittling here. As this article talks about cat woodcarving, let’s get straight to the point.
This tutorial does not guarantee a 100% perfection in woodcarving but will surely cover more than enough tips & trick to start your cat woodcarving project. Before starting the project, make sure you have all the basic tools needed for effective wood carving. Some common carving tools used in carving are as follows
- An illustration sample of the cat
- Carving knife; Chip knives, V and U-Shaped Gouges, and Chisels.
- Transfer Paper
- Wooden block. It is recommended to buy the wooden block from a craft store. Butternut, basswood, and white pine are recommended for carving as they are softwood.
- Clamps and a vise (optional)
After you have gathered all these things, follow the below steps to carve a cat from wood :
Transfer the Illustration
The very first step is to transfer the illustration on the wooden piece using a transfer paper. You can also sketch the same illustration by hand if you’re good at it. One benefit of hand-drawing is that you can customize the size of the cat.
Mark Stop Points
After transferring the illustration on a wooden piece, use a chip knife to make stop cuts on the neck, face, legs, and tail of the cat. Generally, these stop-cuts will help you say within the boundaries of the structure.
Chip and Make a Rough Outline
Now start chipping the wooden piece using a chip knife and chisels to give it a rough outline of a cat. It is recommended to stay away from the outline. The main goal of this step is to exclude the excessive wood from the block. You can also use a U-gouge to scoop the extra wood out of the wooden piece.
Finalize the Design
After making a rough outline, use small knives to chip the wood exactly along its boundary. Remove the extra wood along the next and face and in between the legs. After this, set the cat onto the table using a vise and start finishing the structure per your illustration. Take it slow and be consistent when finishing the face of the cat. The nose is the most critical part and many people end up screwing up the nose.
Polish the Finished Piece
You are done carving the cat, but it doesn’t look appealing, right ? Well, it’s not done yet. You can use wood oil, paste wax, or Danish oil to polish the wood and give it a more realistic look. Also, don’t forget to sand the finished piece.
Note that choosing a sitting cat will make the whole process much easier. I hope this article could help you get started with your cat woodcarving project. If so, I’d love to hear your experience in the comments section.
How To Carve An Elephant Out Of Wood

Looking forward to some useful tips to carve an elephant out of wood ? Well, you’ve come to the right place. No doubt, woodcarving skills are mastered from years of practice, but this post will certainly educate you enough to start carving an elephant out of wood.
Initial Stage of Wood Carving
Before getting busy to make an elephant out of wood, make sure you follow the tips listed below:
- Choose a softer wood from a craft store instead of obtaining it from a common lumber pile. Butternut, basswood, and white pine are some preferred wood for whittling.
- Select the right type of carving knives. Chip carving knives with a 3.5-4cm (1.5 inches) blade can be an ideal choice. Furthermore, get a useful piece of the gouge. You must have 1 U-shaped and 1 V-shaped gouge for the best results.
- Chisels play a key role to help you dig deep into the wood. It is helpful when making deep cuts to give appropriate shape to a wooden
- Check your wood carving tools by applying some basic cuts. You must be very familiar with the sharpness and grip of your carving tools.
Whittling an Elephant out of Wood
Unless you’re an expert with years of experience, one must need a sample illustration to get started with the elephant carving. Well, of course, an expert wouldn’t be reading this article. After getting an illustration from a magazine, internet, or anywhere else, trace the picture on the wooden block using graphite.
Make Initial Cuts
Make sure to choose a wooden block slightly bigger than the illustration. After getting the elephant on the wooden block, make large cuts to exclude wood out of the boundaries. Make sure to start with a small chip. Making large cuts can split the wood block into the half.
Start with the Head
As the elephant head and nose follows a round shape, make several small cuts along the nose to make the stop cuts. Make sure to always make cuts along the wood grain. Using a sharp chip knife will make this easier. The elephant trunk is the most important part, be consistent while narrowing the elephant trunk.
Define the Elephant Ear
After you have completed the elephant trunk, make stop cuts around the elephant near towards the bottom of the ear. Make sure not to cross the stop cuts during the whole carving process. Similarly, give a definite shape to the whole wooden block.
Finished Piece
When giving it a final touch, hold the wooden piece into the clamps or inside a vise. It is not recommended to carve while keeping the wooden block in your lap. Use small knives to finish the piece and make certain details per your illustration.
Final Verdict
Though the carved elephant is already completed, you can still polish the final design with a wax paste, wood spray, or Danish oil. It will give a more realistic to the carved elephant – enhancing the natural color of the wood.
Now, the last step is to show off your new wood carven elephant to your family and friends and awe them with your wood carving awesomeness ! I hope you enjoyed this post about how to carve animals out of wood and will please consider sharing this on Facebook, Pinterest or on X.
You may want to check out this list of the best beginner wood carving tools.