by tom44 | Aug 10, 2018 | DIY Sculpting
Sculpting with clay is so much fun, especially when done with the right type of clay.
However, there are so many types of clay both natural and synthetic and you can’t easily say a particular type of clay is better than others because they all have their pros and cons. Your choice of clay is determined by your personal preference, what you intend to work on, and several other factors.
Your level of experience and expertise is also an important factor since some types of clay are better for beginners than others. So, you do not just choose any clay at random. You need to learn about the different types of clay.
In fact, it is better to patronize a store that offers a wide variety of clay types. Your choice will depend on the options available to you. There are natural earth clays like terracotta, stoneware, and earthenware but you need to understand that these ones are water-based.
Their synthetic counterparts are oil-based. The synthetic clays are collectively called polymer clay. The major advantage of polymer clay is that with proper finish, it can be sculpted to look like other materials like stone or metal. Most importantly, it does not dry out fast so it is easy to work with.
In your choice of clay, you should think of the project you intend to work on. If you plan to glaze your sculpture, then you are better off with natural clay. Your sculpting time frame is a factor to consider too.
Polymer clay does not dry out fast, so if the project will take you days or weeks, you need to opt for polymer clay as it does not dry fast. However, if you have to use natural clay for such project, you will need to keep moistening it regularly.
Since you will need to fire your clay, it is important to consider the kind of firing equipment at your disposal. Terracotta, stonewear, and earthenwear clay should be fired to a temperature between 1,800 to 2,300 degrees. If your firing equipment cannot offer such high temperatures, you need to consider polymer clay that does not require up to that. With polymer clay, you are good with an ordinary home oven.
Even if you enjoy working with a particular kind of clay, another type may be better. So, as a rule of the thumb, it is better to work with different types of clay before you choose the most preferred one. At least, you should work with a small quantity of natural and synthetic clay to know which one works better for you.
Texture is another feature of clay that matters. Different types of clay have different texture and every sculptor likes some textures better than others. Since natural clay dries out quickly, it is advisable to have a spray bottle of water handy when working with it. That way, it will be easier for you to moisten the clay while working on it.
General features to look for in clay

Pliability
Good clay should be pliable enough to assume any shape you have in mind. It is pliability that makes sculpting fun. You can’t have fun when you are struggling with the clay you are using.
In fact, you may not be able to implement exactly what you have in mind when your clay isn’t pliable. You will only end up creating a sculpture that is as close to your original intention as your clay allows you. Remember, it is also pliability that allows kids to have fun molding with clay.
Slow drying
You should also ensure you select the clay that dries slowly. With such clay, you won’t be working under the pressure of completing it before it dries up. You won’t also need to keep wetting it as you work. Well, this may not be a problem when you are working on smaller projects that you can finish within 24 hours. But if it is a large project that will take days or weeks, you need slow drying clay.
Versatility
There is no point buying different types of clay for different projects when you can buy a particular one that works for all kinds of sculpting projects. So, you need to ensure that the clay you want to purchase is suitable for all kinds of projects. It should also be suitable for children, beginners, and sculpting pros.
Another angle to versatility is being ideal to use with tools and hands. Some types of clay are better when you work with your hands and others are better off with tools but ideal types of clay are the ones that are great with both hands and tools. This should be your best bet.
Size variety
To cut cost, it is better to purchase the exact amount of clay for each project. But you can only do that if you have a wide variety of sizes or quantities. In other words, size variety matters too and you should consider it when you are buying your clay.
That being said, here are some of the best types of clay for sculpting. They exhibit all the qualities discussed above.
1. Aurora Sculpting Clay
This clay makes it easy for you to create any sculpture. Its only drawback is that it comes in only gray color but that should not be a problem because you can always paint it with the paint of your preferred color. You just need to wait until it’s dry before you paint it.
If the timeline for the project is not tight, you can finish it up and air-dry it instead of firing it. You can use it for a wide range of projects and most importantly, it is suitable for children since it is safe. Kids can also have fun with it, sculpting what they like.
2. Amaco Clay
The most attractive feature of this clay is that it does not dry out fast. So, it is great for beginners. You can take your time while working with it and you won’t need to keep spraying water on it. The clay comes in different sizes but it also comes in only gray color but you can paint it. You can also choose other varnishes. It is all up to you. This clay is very soft and pliable enough for kids too.
For larger pieces of sculpture, it can be used with pottery wheel. It can either be fired or left to dry up on its own but this will take a relatively longer time. You will definitely enjoy the way it feels in your hand while working on it. Whether it is a small masterpiece or a large project, you can’t get it wrong with this clay. As a reputable sculptor puts it – work is fun when you are working with the right clay. This clay is the right clay.
The clay is oil and wax-based and it is why it is relatively more flexible than most other types of clay. It should not come as a surprise that this clay is mostly used for special effects.
3. Polyform Sculpey Super Clay
This clay is also very pliable and it dries slowly. It is great with both hands and tools. The clay comes in many different sized packs and this gives sculptors more quantity options. The quantity to buy will depend on the size of your project. The clay is produced in brown and beige colors. Color really does not matter as you can paint the sculpture when it is completely dry.
Since it is versatile, the clay can be used for very many projects and it is easy to glue multiple pieces of the clay together. It is also versatile or multipurpose in the sense that professional sculptors, children, and beginners can use it. Finally, sculptures made with this clay have stood the test of time. Durability is one feature you can’t take away from this clay.
Creativity is a trait that is common among the best sculptors all over the world and this clay gives room for innovation and creativity. It is also important to include the fact that there are many more great types of clay apart from the 3 that have been outlined above but they were just selected at random among the best types of clay. They have also been arranged in no particular order.
by tom44 | Aug 9, 2018 | DIY Sculpting

Sculpting wood with a Dremel is a fascinating way to spend your time, as it is an activity where you produce an item that you can use, give as a gift, or even sell as your turn your hobby into a money making venture.
In any such activity, you will need the right amount of knowledge, the skill which you develop over lots and lots of practice, and the right tool for the job.
Nowadays, a dremel is a must if you want a high quality result in wood sculpting. A dremel can be quite intimidating especially for those who are just getting started in sculpting wood. However, it allows you to explore more and improve your wood sculpting skills and output of original projects greatly.

Here is a guide on sculpting wood with a dremel:
- Your place. Find a place where you will feel comfortable and focus well on wood sculpting. You also need to consider people in your chosen place since wood sculpting is quite messy and noisy. It is ideal to have a workbench which you will use particularly in wood sculpting.
- Dremel dreaming. Make your creative wishes and dreams come true as you explore the attachments, accessories, and functions of the dremel. Take time to familiarize yourself with the tool. Remember to hold the blue button whenever you want to try out different attachments.
- Wood Wonder. Choose the wood that you want to use. It may depend on what you are working on but pine is ideal for practice. Choose or make your own design for your wood sculpture. Transfer your design into your chosen wood by stencilling and tracing or via manual drawing.
- Head on. Choose among the cutting heads of the basic dremel kit. It usually comes with eleven heads. However, you can also purchase other cutting heads if you need more than what are included in the basic kit. Then, cut around your design. Use the dremel just like how you would use a pencil to draw.
- Carve Away. Carve the unwanted space while removing the sawdust that the carving accumulates from time to time. Make sure to get rid of the rough spots to make sure that your wood sculpture will look perfect. There are instances when you want some spots rough so just use your personal judgment, depending on the look that you want to achieve with your wood sculpture.
- Final Touches. Retouch, paint, or varnish to make your wood sculpture flawless and to bring it to life. It is better to make final touches when you are done carving. It will show you the impact of each line and the overall visual appeal of the wood sculpture before you make any changes. Aside from making it look great, the paint or varnish will also keep your wood sculpture protected so it will be in its best condition for a long time.
Mastery of wood sculpting tools can take your new hobby of sculpting wood with a Dremel to a whole new level of expertise. Continuous practice will help you achieve mastery so get your dremel and start practicing now. As they say : practice makes perfect !
Carving Wood Signs with a Dremel

The art of creation is something that is unfathomable to some. The sense of fulfilment that you get each time you marvel at your masterpiece is immeasurable. Some may even say that it is quite addictive – that natural high that you get when you take the time to look at what you have created. Your mind is fertile ground for imagination and creativity and will lead you to create some beautiful projects.
You can let your creative juices flow through simple projects like carving wood signs with a dremel to more complex projects once you get the hang of it. Dream, visualize, and create – a dremel allows you to do this and a lot more!
Here are the simple steps that you should follow to create a carved wood sign masterpiece with a dremel:
- Wood selecting. Pick a wood that you want to use for the project. Some of the most popular kinds of wood for wood carving projects are birch, pine, horse chestnut, limewood, and willow. Make sure that you sand its sides well for smoother edges. You can also paint it to achieve the vibe or the visual effect that you desire. You can keep it plain if you want or you can do some rough painting if you want to go for the rustic look.
- Still stencil. Use a pencil to draw what you want to carve into the wood. This will serve as your guide throughout the process. It will also allow you to see how the project will look like once you are done working on it. It allows you to see if the elements of your wood sign are in the right places, has the right design, and has the right spacing. Then, start carving. Ideal carving depth is about 3-4 mm. Make sure to remove the accumulated sawdust from each letter before working on the next one.
- Charge it. Make sure that your dremel is fully-charged for the optimum wood carving experience. This is to ensure that you will be able to finish your wood carving project without having to stop to recharge your dremel. Believe me, it is a bummer when this happens.
Once it is fully charged, you can do a lot of different things with it – cut, engrave, grind, clean, carve, sand, sharpen, and even polish. Make sure that you wear protective gear such as gloves, dust mask, and safety glasses to stay safe while you work on your project.
- Paint freely. Feel free to paint the letters that you carved or just leave them plain. It all depends upon your preferences and the visual effects that you want your project to have. Either way, it is guaranteed to look great, especially when you have carved the letters and any decorative elements smoothly.
With continued practice, you will be amazed at the things that you can do with your dremel. You will love the myriad of wood carving projects that you can create with a dremel. It opens up a world of artistic possibilities for projects that you can show off to your family and friends and feel a sense of accomplishment and pride.
Find the best dremel tools for craft making here
by tom44 | Jul 28, 2018 | DIY Sculpting
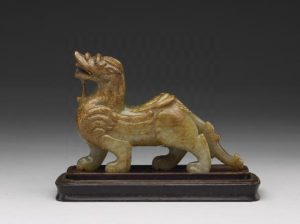
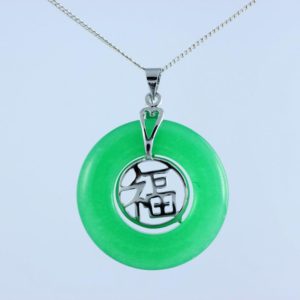
There are various different theories about the uses and meanings of green jade depending on the culture. To most people familiar with its benefits, jade blesses whatever it touches. It has served humanity for at least 6,000 years extending back to the most ancient civilizations.
The earliest known historical records show that the use of jade was engraved on healing prescriptions. From Neothilic times in China and India to the Pre-Columbian era in Guatemala, jade was utilized by most early civilizations.
Early Indians in Mexico as well as the indigenous Polynesian people of New Zealand carved it into deity ornaments for their various rituals and ceremonies. Even without the benefit of using a dremel to carve jade, people who lived long ago were able to create beautiful items from this unique stone.
Green jade is the most popular variety of this gemstone. Most people believe it is a lucky stone which will bring good health, prosperity, and love. It has a reputation for helping people realize their potential and achieve their goals. If you are depressed and need consolation or have other troubling emotional issues, green jade is considered to offer positive energy and beneficial resolutions.
Let us explore some of the common uses of green jade.
Wealth
Green jade is thought to help one achieve financial prosperity by boosting creative thoughts and ideas. By enhancing your imagination, you will have many more fresh, unique and groundbreaking ideas for business or other endeavors.
As a result, you will be able to acquire new innovative ideas for entrepreneurship. You will be poised to make smart decisions that will help you achieve unexpected success.
The mysterious stone also will assist you in your understanding of your dreams. You will be able to discover your goals (and achieve them) according to your desires and talents. Green jade helps you realize your gifts and strengths. With this clarity of understanding, you will be able to recover from any major disappointment or failure.
For these reasons, green jade is considered by many people to be a professional support stone.
Love and Relationships
If you need to bring calm and peace into a chaotic life of confusion and inconsistencies, green jade is thought to offer quick and effective solutions.
Personal peace is a desirable state of mind for everyone since it allows one to live a happy life without strife and anxiety.
Green jade also helps to eliminate undesirable negative energy. In its place, it brings positive energy that will empower its owner. A flow of positive energy will transform your life and lead to more personal happiness.
As an example, if you feel exposed to an attack that you are not sure that you can deal with, green jade gives you the strength to fight.
When it comes to challenges in your personal life, be sure to keep your jade close at hand because it is your partner during struggles. It helps you in facing fears and adjusting to any negativity.
Jade keeps you optimistic and confident in making critical life decisions. If you happen to be in a negative love situation, the stone encourages and brightens your life. It is considered by many people to be magical; it turns your sadness into happiness. With jade, there is more positive energy and healthy perspective to life.
Green jade is also your partner in relieving anger. Relationships are uncertain and often disappointing. Whenever you are bitter from heartbreak, angry about something that someone did or said, or feeling sad or frustrated due to the pressures of life, keep the stone in your pocket or purse and your mood will change.
Green jade does not necessarily reverse the negative effects but it boosts your energy which will help you to deal with the situation.
It will help to remove any tensions in a relationship which lower your emotions. You can actually change your weaknesses into strengths; while you feel hurt and disappointed with a partner, this stone helps you to rise above the disappointments. You can be positive and upbeat and get over the disappointment you feel.
The stone helps to remove any negative thing which does not belong to your true self. If you are an extrovert, it will restore this type of energy even when you are disappointed by people. With the stone in your pocket, you gradually will come to understand true love and romance. Falling out of a romantic relationship is often due to mistrust or a slight misunderstanding, Green jade enhances your ability to see clearly any undesirable elements and work on them to help restore or maintain an existing relationship.
Achieving Balance In Life
Steadfastness and stability in life are crucial to achieve a sense of peace and contentment. Green jade is thought to prevent or lessen emotional imbalances due to disappointments or struggles in life.
While most human beings naturally react and respond to positivity and negativity, moderation of emotions and their expression are important. Green jade ensures your mind remains stable at all times to assist you in making wise decisions.
Whenever you are unsure or anxious of the next step in your life, green jade will help to calm you down. You will be less anxious about the uncertainty of life if you have this healing stone in your possession and trust in it.
by tom44 | Jul 24, 2018 | DIY Sculpting
Welcome to my guide on how to carve jade with a dremel.
The art of carving jade has a long tradition that spans many generations.
Like in every other task, technology has provided modern tools to ease the process and produce complex designs. As a result, carving today is an intense exercise with perfected precision.
Carving jade requires a keen study of the properties of this unique material. A carver needs to examine the patterns before commencing on the task. Carving into a rock is a gratifying experience that many consider therapeutic. To maximize the precision and accuracy of your designs, a dremel is a critical and useful tool.
In this article we will examine how to carve jade with a dremel. Learning how to use a dremel will save you hours of carving time traditionally spent using a hammer and chisel.
Collect Your Material and Tools
First, gather your rocks and a dremel with its different tips. The tips are part of the package that came with the tool when you purchased it. You also need a glass of water, a small towel, and workbench. Acquire safety glasses and use them to protect you from any danger to your eyes.
The Workspace
Carving is a manual job and this means your body posture is vital. Set up your workbench to create ample room for you move around freely without the need to crouch over or turn and twist your back for long hours.
Your posture should also allow you to move around the piece of jade. All the materials you need ought to be near you so that you will not need to move around very much. Avoid cramped workspaces to eliminate the possibility of confusion.
Confusion arises from disruption of concentration. Focus on having open spaces as much as possible.
All of these aspects of learning how to carve jade with a dremel are important to keep in mind.
Always wear your safety glasses to avoid the debris from reaching your eyes and face.
Finally, use your fingers to determine how the grain runs on the stone. The grain often runs along the piece to guide your carving. Remember that carving across grains easily causes weak-points and cracks that result in splitting. You will want, therefore, to be cautious about every piece and its unique grain patterns.
Preparation Steps
First, make a sketch or rough outline of your intended design with a pencil. This is a necessary and crucial part of the process. Defining your complete product before you even begin provides the guide that will ensure you get the final results you desire. If you will be carving a relief, an outline is very essential.
Avoid rushing to create your design. You risk breaking the jade with your dremel. Instead, carve slowly bit by bit as you observe the progress. Practicing patience is very important when learning how to carve jade with a Dremel.
Beginning at the center of the stone and work outwards is the best way to avoid cracks. Avoid the urge of beginning at edges as this usually increases the risk of cracking. Limit your speed or you will make an irreversible mistake by chipping away the wrong way.
Sanding
Silicon carbide sandpaper is among the best tools for completing your work. Use course sandpaper grit for a quick smoothing process. The coarser it is the more polished your product will emerge. You may begin by the obvious excessive rough spots before you proceed to smooth the entire piece.
More Tips
Change dremel bits depending on the hardness of the stone. Each bit is designed for a specific level of hardness so find the appropriate one.
The smoothest carvings can be produced by a 45-degree angle. Do not use the tip straight up if you want to have a quick, easy, and smooth carving. If you want a rough outline, on the other hand, take a big tip. The options can allow you to make any desired shape and shading. They cut deep and are more efficient that a grinding tip.
Always ensure you have observed safety precautions like wearing protective gear. Do not ignore safety precautions and put your body in harm’s way. Your positioning is also very vital. Sit up straight to avoid neck-aches and back-aches.
Conclusion
Jade is an outstanding material for craft making because it is so durable. It is also cheaply found and any items made from it will last a long time because this material is very hard to destroy. Any creations made from jade can make very beautiful decorations if handled with precision and creativity.
Most importantly, jade is easily accessible and easy on your budget. You never need worry about items made from jade losing their value, as they will always maintain their quality. Jade products can save your memories for a long time without much care required to maintain them. A good dremel will help you produce high quality jade crafts and artworks if you learn how to use this special tool appropriately.
by tom44 | Jul 18, 2018 | DIY Sculpting
Common Materials Used For Sculpting

Sculpting as a medium of expression goes beyond the pristine statues and other masterpieces of art which were sculpted by the great artists of the High Renaissance like Michelangelo.
One very different example could be a funny looking figure of a sheep in an animated screen calling himself “Shawn”. It could be a virtual sculpt in 3D software like the Maya, Mudbox, Zbrush etc. Although 3D software creations may have their own charm, having an inanimate object in your hand and breathing life into it brings exuberant joy and produces a feeling of freedom of expression.
But which medium is the best and what are the different types of sculpture materials that one would need to kick start a sculpting venture ? Here’s a cursory review of some of the cool sculpting materials you can use for your next project, whether it be large or small.
Various Types Of Sculpting Materials Exist
There is a wide variety of awesome options available when it comes to sculpting your imagination, bringing form to nebulous creatures, beckoning them from your dreams and nightmares. Following is a list of the various types of sculpting materials that you can scour through and decide for yourself, as to which one you would want to pursue for some leisure art in your backyard or your home studio.
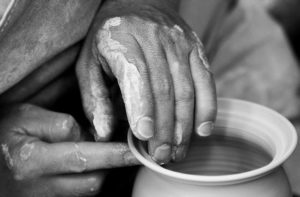
Clay
Clay is one of the most versatile of the sculpting mediums and is the only medium that can be allowed amongst kids as young as preschool age as it is flexible and will not cause a fatal choking hazard under proper monitoring! Owing to its very dough like ductile and malleable form, clay is used in a wide variety and genres of sculpting art.
Clay comes in many types. There are clay products that are oil based and are excellent for making durable art works that can be used as decorative objects. There are clay varieties that are plastic based with plastic elements that provide the clay with elasticity which normal clay does not have.
Clay sculpting is fairly easy to learn, practice and master. In addition, it is among the most affordable of all sculpting materials with the possible exceptions of sand sculpting, rock sculpting or word carving.
Bronze
Bronze is the most popular material used in caste metal sculpting. The sculpting method is simply called bronze.
The process by which the bronze sculpting is done is the traditional lost-wax casting process which has been historically used for magnificent sculpting across many civilizations across the ages.
The metal had been revered across the millennia by various cultures and hence was widely prevalent as a medium of sculpting deities and figurines for worship.
The process of obtaining a fine art sculpture using bronze as the source material makes it a bit too complex to be practiced at home. This is among one of the types of sculpting techniques which needs to be taught and monitored by skilled experts. The material and the technique are not suitable for kids or even novice adult students.
Terracotta
Like glazed clay, terracotta is a medium that is highly popular among the masses. This particular material has been the medium of creation and expression amongst artists and artisans who had no means to obtain marble or precious metals to sculpt, beginning back in prehistoric times.

Not only used as an art form but terracotta is also used to create utilities like pottery that blends culinary art and sculpture. Terracotta is also the preferred medium of art for making 3D murals. Being among the few mediums that are readily available and easily processed, terracotta can enliven your backyard art and any craft project. The most popular and well known of all terracotta creations in history is the Chinese Terracotta Army from 210–209 BCE.
Plaster of Paris (POP)
Plaster of Paris (or POP as it is widely known) has become another trendy form of sculpting and this material is professionally used to create beautiful wall hanging murals, show pieces, centerpieces, statues etc. It’s a little easier on your budget when compared with the other sculpting material options like terracotta and clay.
Alabaster
Alabaster is a type of soft rock that is widely used by stone sculptors. It’s a smooth, soft gypsum rock and it literally means “soft”.
An alabaster rock, as a sculpting medium, gives more flexibility than marble, granite or other hard rocks. Marble being a metamorphic rock is twice as hard as an alabaster rock. Although the methodology of sculpting both alabaster and marble is somewhat different, they make use of the same set of tools.
You can craft sturdy statues, bowls, vases, etc. if you master this particular material. You will need rock solid practice, perseverance and patience to grasp the nuances and tricks of stone sculpting.
Foam or Styrofoam
Foam is the exact antonym of stone! And the exact opposite of sturdiness. Foam or Styrofoam provides a lot of fun whilst sculpting. It can be a very challenging material to master. This particular material provides some sort of flexibility but can be tough to master as it is too delicate for rigid and rugged hands.
Some sculpture artists use a hot knife to carve the desired shape as this material breaks too often with any blunt edges of any tool that you might be using. Foam is also a very inexpensive medium the same as sand, wood or clay. It’s also one of the most kid friendly mediums that can be explored by young ones after they get creatively exhausted from sculpting with clay for too long.
Papier-Mâché Sculpting
Another well-known medium is Papier Mâché, which as the name suggests is nothing but paper. More precisely, it is a textured variety of paper.
With paper mache you can explore and create a wide variety of wall art, abstract sculptures, animal sculptures, origami, DIY arts and crafts and so much more. In addition, it is among the safest of all mediums and hence recommended for tiny tots to create fun objects with.
Who would have known that the Chinese invention could be a medium of expression not just when it is inked but also when it is bend, curved, carved and folded beyond recognition to make something unique and appealing.
Now that you are more familiar with the various types of sculpture materials, you can choose one and create your own masterpiece.