For whatever reason, you have some ugly lamps and light fixtures in your home. However, you are well aware of the damage that is happening to our earth with all the garbage that is thrown in the dumps all over the country. We can take those ugly light fixtures and make an amazing work of art that everyone is jealous of. Be green and an interior designer too !
What is sea glass ?
All the glass and bottles that are
tossed into the lakes, seas, and oceans can remain in the waters for decades.
Over the years, whether it is a glass bottle, a drinking glass or another type
of glass that has been discarded into the lakes or oceans, break into smaller
pieces. These smaller pieces then toss and turn, tumble over rocks, sand and
through the heavy turbulence of waves. This, in turn, smooths out the glass
edges and gives the broken pieces a frosted look.
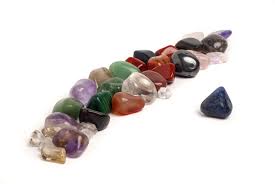
As you take that daily stroll along the
water’s edge, you will see big and little pieces of this glass. We call them
sea glass. To some, yes it is garbage, to others with an imagination, a trained
eye and some capability and talent, these broken pieces of glass are gorgeous
and more than worth picking up.
There are many items you can make with sea glass. Some of these require very little work or imagination, while other items need a trained eye to picture what that little piece of glass, and it’s sisters and brothers that you collect, can be turned into a breathtaking work of art, someone’s most treasured belonging or even used to design a light fixture. Let’s focus on that for now.
Light fixtures are an item that you can easily visit a department store and purchase at any time. However, there is no meaning, no love, no excitement in a store bought fixture.
Making light fixtures using sea glass is not as complicated as you would imagine. They definitely are not expensive to make. For those who love the look of certain name brand light fixtures, we will show you how to go about making your own style of light fixture to replicate the heavily priced versions.
The first suggestion is to visit your local thrift stores and shop for cheap and ugly light fixtures. Yes, ugly! You are going to take that ugly duckling home and turn it into a beautiful swan. I also suggest visiting the local lakes or oceans where you live. Take a nice long walk while staring down at the sand. Along the way, pick up each piece of glass you come across. Every piece. Then, on your way home, stop and pick up some glue, preferably clear glue. There is a brand in stores specifically labeled glass glue. I get my glue from Amazon and recommend this one right here. This glue is waterproof and heat resistant. You do need the heat resistance when using for a light fixture.
Many sea glass artists choose to leave the sea glass unpolished. Others choose to polish their pieces. Polishing the sea glass is actually very easy. All you do is mix dish soap into a bowl of water, set the pieces into the water and let soak for roughly two hours. Using a toothbrush, scrub the sea glass while in the water. It is going to take extra time to get into the crevices with the toothbrush. Using a strainer, put all the pieces into the strainer and rinse well with cold water. It will help to actually pick up the pieces one by one and rinse and check for dirt still in crevices. After rinsing, place the sea glass onto a tumbler to dry.
When dry, place the sea glass into a rock tumbler like this one here along with Silicon Carbide or Aluminum Oxide grit. It will help to add cornmeal to the tumbler. This will act as a cushion between the grit and the glass. Check on the glass every twelve hours or until the desired polish has been achieved. If you choose, there is another method to polish your sea glass pieces. You can put a drop of baby oil in the center of a paper towel and gently wipe each piece with the baby oil.
Now the time has come to do the fun part. After you have cleaned the light fixtures you picked up from thrift stores, be sure to dry it well. Be sure also to have a plan in mind for each light fixture. It may be beneficial to make a rough drawing for each fixture, then lay out the glass pieces in your design. It will be easier than second guessing yourself or finding that you made a mistake halfway through and need to start all over again. Seriously, if you have the drawing, then you can lay out the glass pieces in the order and color scheme that you want.
Now take your light fixture and put glue
onto one area at a time. Carefully place your colored pieces where you want in
that section. Some choose to let each section dry before moving onto the next.
Either way, continue section by section with the glue and then glass.
Of course, I would not let this article
end there. There are other ways that you can create a beautiful light fixture
using sea glass. It is a bit more difficult, but just as pleasing if not more
so. In the following method, all you need is a basic frame for a light fixture.
We will then turn our sea glass into strands of shiny opulence.
Let’s gather the necessary tools first. You will need a Sturdy clear fishing line or similar line. The basic frame with the electric cord and bulb fixture. You can choose to use metal or wood, whatever you choose. Be very green and collect some sturdy twigs, the vines that grow from the tops of trees downward work great, (think of Tarzan singing through the trees). A Dremel with a drill bit like these shown here or any type that you use to make your jewelry will work. Diamond drill bits are the only bits for drilling glass, with little if any splicing of the glass.
For the jittery souls like me out there,
I recommend a drill that you can control via the foot pedal. That way, if your
glass slips and starts to slide and makes you jump, your foot will come off the
pedal, therefore saving you from a strange and unfortunate accident with the
drill and your hair, or other items too close to the drill. Safety speaks
wonders, be safe and not sorry!
If you have a smaller version of a vise grip, that would be ideal to hold your piece of glass while you drill your hole through it. These are often called hand pin vise grip tool. Place your piece of sea glass into the grip pin and line up where you want the hole. Slowly begin drilling and finish the holes in all your sea glass pieces. Now it is the time to begin stringing the sea glass pieces. When stringing, again, be sure that you have a plan set out before you begin.
When you know ahead of time how many pieces of sea glass you want on each string, and how many strings you want in total, allows you to complete a project with no issues of being short a few sea glass pieces, or not having enough string cut. As you add a piece of sea glass on the string, be sure to make a knot to hold the sea glass in place. You will want to do this for each piece of glass that you add on each string. So if you have chosen to make a hanging string with six pieces of sea glass, you will need to put a knot under each of those six pieces.
Now we want to take the framing that we
chose. This would be a fixture with the bulb components and electrical cord
attached. It may be a plain round metal circle with cross bars to hold the bulb
fixture. Let’s say this circle is a 12 inch diameter, you will want to space
out your hanging sea glass into equal spacing. However, if you were to string
enough sea glass in close enough strings, it will make a very shiny light
fixture. By filling the string with sea glass, there will be no bare spots.
Since glass is a reflector for light, the light will be increased.
Another form of light we can create involves a string of clear LED lights, as in Christmas light strings. By utilizing the string of lights, you only need to attach the sea glass to each LED bulb. This will be done by using your Dremel to drill a hole large enough to fit over the bulb. Using a glue that is specially made for gluing glass like this brand that I use, you can glue the sea glass to the element casing, This is a fabulous idea for lights across a room.
While you are at your local thrift
store, look for some plain globes for lights. As before, you can glue your
pieces of sea glass onto the globe in all one color, create a design or a
picture of basically anything, say a dragonfly.
Also, a great idea is to find votive
cups for candles. Or even electric lights. These can be fun to decorate with
sea glass in multiple colors. The sea glass throws off a light reflection in
the many colors you use.
An idea that is free of electric or even batteries is to utilize the sun light. For this, you will need to purchase some plain solar lights. The shape will not matter, you will be covering them in sea glass pieces. The sun creates the power of light for you and will allow for a gorgeous patio, deck or outdoor seating area filled with beautiful pieces of art. As night begins to fall, your creative sea glass lights will start to shine.
The next idea is not technically a light
fixture, however, once you adhere sea glass to the surrounding, you will have
an impressive fireplace surround. Again, I suggest planning ahead. Be sure you
have the amount of sea glass that you need to cover the desired area. Have a
picture or drawing at the ready so you know which color will go where. Work in
sections so that your glass glue does not dry out. There you have it. It will
reflect light from each and every fire you have in your fireplace.
We all have at least one plain lamp at
home. It is simple and has a plain colored lamp shade. If you want to add a splash
of color to it, adhere sea glass right onto the lampshade. Yes, it will stick
to the material type of lamp shade. I have used sea glass and glass glue to
cover a glass shade on a small three way light I have in my bedroom. It turned
out fabulous! I did not use a drawing, I just placed different colors all over
the glass and let it dry well before using the light.
If you are out at the thrift store or
hitting up the local garage sales, keep an eye out for chandeliers. Yes, any
type of chandelier can work. If there are crystal tear drops, replace those
with sea glass. Even just a few pieces of sea glass can make a world of
difference on a light.
Adhering the sea glass does not have to
be just on the lamp shade itself. You can use sea glass to decorate a glass
light. Especially beautiful is if you can locate a clear glass base. Cover that
with different colors of sea glass and watch the beauty appear in front of your
eyes.
Lest I forget, when you have attached
all your sea glass to the lamp shade, light base, votive cups or fireplace
surround, consider putting a grout all over between the glass pieces and wipe
off the sea glass so your grout does not harden on it. When that is fully dry,
purchase a can or two of sealer, or use a coat or two of polyurethane to cover
it all and protect the sea glass. Not only is it added protection, but it also
ensures that no pieces will come unattached.
On your outdoor fixtures that you
covered with sea glass, use a thin set bonding mortar, as this is moisture
resistant. The final coating of sealant, you should always consider a high
quality sealer.
What is the main point of this whole
article? Well, simply that you can trash that may have been thrown in the ocean
decades ago and turn it into something fabulous, something that every friend
will be envious of. The world of art and broken glass collides and you see art,
make it happen. The art of adhering sea glass to a base of some sort, whether
it is glass, wood or material, is not a complicated process. It does not take forever
to create this work of art and it does not involve a lot of money. Take a walk
along the ocean, beach or lake. Keep your eyes open and you will be amazed at
what you find.
With the treasure that you locate, you can re-purpose an old lamp, light fixture or any one of a number of things. Do not forget the votive cups for candles. The will also reflect this gorgeous light once the art is created.
I hope you enjoyed this post and learned something new. If you did, can you please do me a favor ? Please share this post on Facebook or Twitter. Thanks so much ! 🙂
Welcome to my guide on how to polish sea glass with a dremel. I hope I can convey some useful tips to you.
In order to polish sea glass, the right tools are required. With the usage of a dremel, this task has never been easier. It is great for the smaller glass projects that need to be completed and a dremel can also restore the finish to classic antiques. That’s why this rotary tool is utilized in so many different contexts.
Since the tool operates at a high rate
of speed, a high quality result is created. However, it is important for those
who are responsible for operating a dremel to learn as much as possible about
the process beforehand. Otherwise, a sea glass polishing project may not come
to fruition as easily as we had hoped.
With the help of this multi step
process, the grinding and polishing of sea glass is made simple. While this
process does take some time, the results are undeniable. For starters, it is
important to utilize safety glasses. This keeps us safe from flying glass or
any other accidents that may take place along the way.
Sea glass is typically polished by those who visit beaches on a regular basis and are looking to use it as jewelry. Since these pieces of glass come in a wide range of colors, it is easy to see why so many people are accustomed to utilizing it in this manner. There is just something about a piece of sea glass that cannot be duplicated by any other minerals.
When the glass is tumbled in salt water, it can take on a greater shine. In order to enhance the natural beauty of sea glass, a good quality dremel tool like one of these I reviewed in this post is needed. Proper cleansing and polishing is key in these instances. The transparency is heightened after project of this nature are completed and it becomes easier to utilize the sea glass in various pieces of jewelry.
Before that can happen, the proper steps must be taken, though. Let’s take a closer look at the process and go step by step. It all starts with some garden variety dish soap…..
Step 1: Cleaning The Glass
Take the aforementioned dish soap and
mix it in with a bowl of water. By allowing the sea glass to soak for a few
hours, this removes all of the hard to reach grit and grime from the cracks and
crevices. Those who are looking to clean the glass even further may decide that
they wish to use a toothbrush inside of the sea glass’ crevices. Dirt will
typically build up within these areas.
Be sure to rinse the glass until all of
the soap has already been washed away. From there, place the glass onto a towel
and allow it to dry. This ensures that the sea glass is fully prepared for
polishing and keeps dirt and debris from building up. Some may choose to dive
right in, however.
Step 2: Using a Buffing Pad
A buffing pad is one of the most crucial
tools that is going to be used once it comes time to start polishing sea glass
with a dremel. Knowing how to polish sea glass with a dremel is all about using
the tools that are on hand. Take the buffing pad and secure it to the tool.
Before the buffing pad is attached, it needs to be wet with the proper
compound.
For best results, use 100 grit to 140 grit compound for any sea glass polishing projects. Take the time to buff the glass’ surface with smaller, circular motions. In order to grind away all of the imperfections that are found in sea glass, the polisher must make sure to overlap each circle that is being created as they work their way across the glass.
Once the compound that is being used
begins to dry, it is time to use additional compound. Don’t make the mistake of
applying the additional compound too early. Make sure that the previous
compound has been given the chance to dry. For best results, place the dremel
tool on a speed setting somewhere between 1000 RPM and 1400 RPM.
Step 3: Removing Buildup
This is a step that is often ignored, especially by those who are learning how to polish sea glass with a dremel. It is important to stop buffing every so often. Experts recommend that we stop buffing every few minutes, so that we can remove all of the buildup that is accumulating on the tip of the dremel tool being used.
All you need is a drinking glass or tumbler full of water to make sure of the dremel tip’s continued cleanliness. Removing buildup from the buffing pad is equally simple. The dremel will need to be turned onto the highest possible speed for best possible results. Steps #2 and #3 must be repeated until the entire surface of the sea glass has already been buffed.
Step 4: More Cleaning
Step four is similar to step one, in the
sense that it is focused on the cleaning aspect. A cotton towel can be used for
this step, in addition to some warm water. As the polishing process takes
place, sanding compound residue buildup becomes a greater potential issue. Take
the time to remove all of this residue from the surface of the glass before
continuing.
Step 5: Swapping Out The Buffing Pad
Now, it is time for a new buffing pad to
complete the remainder of the sea glass polishing project. Once the new has
been swapped out, apply the correct diamond glass polishing compound. Most
experts recommend using 270 grit to 300 grit compound for the best results. The
same steps that took place before must now be repeated with the new buffing pad
and compound.
When it comes to grinding the glass,
this is the very last stage. The dremel speed settings should be placed
somewhere between 1000 and 5000 RPM. If there are any remaining imperfections,
this is our chance to fully remove them before it is too late. To test out the
results, run your hands across the surface of the sea glass that is being
polished.
Step 6: Removing Additional Scratches
Even after the previous step has been
completed, various imperfections and scratches may still remain. They must be
removed as quickly as possible. The buffing pad will need to be swapped out
once again. Do not try to use the same buffing pad that was utilized for the
previous steps. The scratches left by the grinding process will not be removed
as easily.
Once the new buffing pad has been applied, it is time to apply some 300 to 400 grit glass polishing compound as well. Repeat the same steps that were taken before and keep the speed setting the same as the previous step. Knowing how to polish sea glass with a dremel is all about patience. Don’t stop buffing until any and all scratches can be removed from the sea glass surface.
Step 7: Creating The Necessary Clarity
Of course, the buffing pad needs to be
swapped out once again. Once the new buffing pad has been applied, cerium oxide
glass polishing compound must also be used. This is how the necessary clarity
is created and it is an especially important step of the process for those who
are looking to make their own jewelry out of sea glass.
After all, no one wants to wear or
purchase cloudy jewelry of any kind, even if it made from sea glass. Repeat the
same steps that were taken before to remove all of the most minor scratches
from the sea glass’ surface. If there is any sort of haze on the sea glass
surface, this is also the perfect time to remove it from the equation entirely.
Use the same speed setting (1000 to 5000 RPM) that was utilized to finish the
previous steps.
This is your chance to buff the surface
until you are completely satisfied with what has taken place. Don’t be shy
about taking your time and overlapping each circle. This is the final step that
is taken before the sea glass polishing is fully complete.
What About Sea Glass Drilling?
In many cases, those who have completed
the sea glass polishing process will want to create jewelry or use the polished
glass for any number of additional purposes. In these instances, there are a
few key tips for sea glass drilling that must be taken into account.
Drilling sea glass is not always as easy
as it looks and the process comes with a bit of trial and error. For the most
part, drillers are going to want to drill through the glass without having to
take the time to turn it over. However, this can cause issues when the hole is
not nearly as clean on the other side of the sea glass.
Let’s take a closer look at some of the
most crucial tips and pointers for those who are looking to use their polished
sea glass for additional projects that require the usage of a dremel drill…
Watch The Thinner and Smaller Pieces Closely
The thinner pieces can be very
problematic when it comes time for drilling. There are a number of issues that
can occur in these instances, including breakage. To avoid these types of
occurrences, place the proper amount of pressure on the piece of sea glass. Too
much pressure and the thinner pieces will break. Too little pressure and the
drilling process will need to be repeated.
Smaller pieces must also be watched very
closely. There are going to be moments when the smaller pieces get caught on the
end of the dremel drill being used. It is important not to panic at this time.
Be sure to slowly and carefully turn off the dremel drill before addressing the
problem that is taking place.
Do not bend the drill bit when removing
the glass. Carefully turn it back and forth until it is removed. For best
results, hold the piece of glass in one hand and the drill/bit in the other. Do
not be impatient. This process may take a few minutes to complete. Taking your
time sure beats destroying a perfectly good piece of sea glass.
Drilling Underwater
Drilling underwater is a necessity. The
drill bit and the sea glass are both going to get very hot during the drilling
process. The water will keep the drill cool as it makes its way through each
surface. Debris and glass is also washed away by the water. Plastic bowls are
best, as they can withstand the wear and tear that occur when bits of glass fly
off.
When you are working with a dremel drill
that has a cord, do not make the mistake of submerging the entire tool. As you
may have imagined, electricity and water do not go together all that well.
Caution is key.
Use a Drill Press or Stationary Drill
When pressure is applied to sea glass,
it is important that we increase our level of concentration. These tools allow
for the driller to apply an even, slow amount of pressure onto the glass. For
those who are worried about their hands shaking and moving while the process is
taking place, a drill press or stationary drill is a powerful tool.
Handheld Tools Often Work Best
To build on the previous point, there are many who are easily startled by this process. Even those who are experienced when it comes to polishing and drilling sea glass with a dremel may need a refresher course on the matter. Drill bits often tend to “jump” over the sea glass while it is being drilled and that is why handheld tools tend to work the best in these instances.
Mind your surroundings as well. There
are a number of work areas that are ripe for accidents and those who are
looking to avoid them will want to make sure that they are taking a look around
first. Otherwise, they could be placing themselves and their work studio in
jeopardy. Devices that are controlled with the usage of foot pedals work
wonders, too.
Going to use a tool that has an on/off
switch on the handle? Make sure that your nerves are steady. There’s no reason
to use such tools if you do not honestly believe that you are capable of
handling them.
When it comes to learning how to polish
sea glass with a dremel, the process does not have to be as complicated as it
seems. It also does not have to be as challenging as it seems. Those who strike
the balance between these two mindsets are going to experience the greatest
level of success over the long haul. Tools must be handled with care and the
process must be treated respectfully.
Learning how to polish sea glass with a dremel is a popular DIY skill to know because it can serve as the springboard for so many others. Looking to make awesome, unique jewelry for your friends and loved ones? Knowing how to polish sea glass with a dremel is a must and drilling is crucial as well, especially for anyone looking to utilize their sea glass for follow up projects.
With the help of this multi step process, even novices can get the most out of their next do it yourself craft project. Put in the proper time and effort to get the best looking polish possible and set the table for all of your future DIY projects to come. There is no limit to what we can accomplish when we are willing to put in the work necessary!
Please share this post on Facebook, Pinterest or X (formerly known as Twitter). Thanks !!
Carving alabaster with a dremel is not that hard when you know how.
When it comes to learning the skill of carving alabaster with a dremel, there are a number of considerations that need to be made. Carving alabaster with a dremel may seem deceptively simple but those who are looking to get the most out of their projects will definitely want to read on and learn more.
These pointers are especially helpful to
those who are learning how to carve alabaster with a dremel for the first time.
Every step of the process is equally important. It is important for readers to
fully grasp each step. Otherwise, a wide range of mistakes can occur.
Let’s start with the most crucial tips and pointers.
Learning how to carve alabaster with a dremel does not have to be a major challenge but that does not mean that we should be taking any unnecessary chances.
Alabaster Stone Is Highly Unique
There are some who may believe that they
are ready to begin carving because they have handled projects that are similar
in the past. However, alabaster is a highly unique stone and must be treated
differently from other carving projects. The same techniques might be used but
the process is not going to be the same.
The sculpting process tends to be more
slow. This is a solid stone that is not going to respond in the same way as other
stones would. Take everything that you know about carving stones with a dremel
and toss it out the window. While some techniques from past projects may work
just fine, there are not any perfect 1:1 comparisons to speak of.
Obtaining The Proper Equipment
Of course, the project cannot begin in earnest until the carver has taken the time to obtain the proper equipment. A heavy duty dremel such as one of these shown here in this review post, is typically the best choice. While some may wish to use mallets and chisels to aid them during this project, these tools do not provide the same level of precision as the dremel.
Mallets and chisels are also more taxing
than the dremel from a physical standpoint. These tools do not offer the same
level of discretion. Others may want to equip their working areas with a vacuum
system, so that all extraneous dust can be removed from the premises.
A felt pen can be used to create a rough
outline on the alabaster stone that is being carved. A glass of water should
also be kept close by. This allows the carver to clean their area and make sure
that no mistakes are being made. The process is much slower than the process
for carving other stones. Be prepared for this reality.
Don’t Forget The Sand Bags
This is a step of the preparation
process that can be easily forgotten, especially by those who are not used to
carving alabaster with a dremel. These bags are utilized as a means of holding
the alabaster stone in place during the process of learning how to learning how
to carve alabaster with a dremel.
These bags are also useful when it comes
to propping up stones that are not perfectly shaped. The sand bags should be
chosen with durability in mind as well. If the fabric does not have the correct
level of durability, the project becomes that much more difficult.
Sand bags that are used by photographers
and film makers do not need to be used for projects of this nature. They do not
offer the necessary durability. These bags are made for fancier usage and
cannot handle the dirt and grime that is created during the carving process.
Some may even decide that they wish to make their own sand bags, just to be on
the safe side.
Protect Your Eyes and Ears
Carving alabaster with a dremel can be a
lot of fun but eye protection and ear protection is of the utmost importance.
Make sure to have a pair of goggles and a dust mask at the ready. While most
readers are probably rolling their eyes at the obviousness of this pointer,
there are many who have probably not obtained the correct protection for their
ears.
When alabaster stone is being carved,
the noise that is created can be damaging to the ears. The ringing noise will
only increase in pitch as the project continues. This is definitely going to
wear thin fast. Don’t neglect the importance of ear protection when
contemplating a project of this nature.
Making The Stone Easier To Work With
The exterior of the alabaster stone may
be rough. However, learning how to carve alabaster with a dremel is all about
taking the time to learn as much as possible. When carving by hand, it is
important to make the stone as easy to work with as possible. The rougher parts
of the exterior need to be ground down.
If the stone is not smooth yet, this is
a sign that more work needs to be done before the project can begin. Those who
attempt to carve rougher stones are placing themselves in a position that is
less than advantageous. Do not become overly worried about the removal of
material. This step is all about making sure that the stone is smooth enough
for carving. Many experts recommend using an electric grinder.
Choosing The Right Stone
Of course, the stone becomes even easier
to work with when the right one has been chosen. Do you already have a finished
product in mind? If so, the best decision that you can make is to choose a
stone whose shape aligns with this vision. The closer the stone is to the final
product, the less work the carver will need to do over the course of the
project.
There is also less stone to be wasted in
these instances. Others may decide that they wish to take a different approach
to choosing a stone. Some will elect to choose a stone at random and analyze it
closely. Instead of having a specific design in mind, they will let the stone
speak to them.
In some cases, there just may be
something inside of that stone that is waiting to make its way out. Carvers who
are willing to analyze stones to find out more about their true makeup may
decide that they would rather take this approach, as opposed to going into the
project with a set outcome in mind.
Drawing The Image Onto The Stone
Once the alabaster is smooth, the carver
can draw their chosen image onto the stone and prepare for further carving. A
felt tip pen is in your best interests. Do not use pencils and Sharpies. A
pencil is going to carve into the stone unintentionally and create issues that
need to be addressed during the latter stages.
There are also going to be stones that
keep us from using pencil for more logical reasons. For example, there are a
wide range of stones that cannot be marked with pencil because the carver is
not going to be able to see the marking once it is made.
Sharpies may seem like the best choice
but these cannot be used either. In many cases, even the slightest Sharpie
markings will melt into the stone and render it unable to be used. Sharpies
also create far more mess. It cannot be erased once it has been used, either.
Crayons, felt tip pens, crayons and even
pieces of other stones can be utilized for this step. Pieces of soapstone may
not seem like the most obvious choice but these pieces offer carvers the chance
to make markings that are not permanent. Wax crayons are often the best bet,
though.
Don’t Let The Dremel Tool Get Wet
There are some who will claim that the
dremel tool is not as useful as other tools that can be utilized for carving
alabaster. On the other hand, those who have used a dremel in the past are well
aware of the basics of carving. For starters, the dremel is only going to work
in the appropriate manner if it remains dry throughout the duration of the
process.
Did you know that stones are typically
carved without the usage of heavy duty equipment? While a dremel can help in a
number of ways, the tool needs to be treated properly in order for a carver to
get the most out of it. The piece does not need to be left underwater for an extended
period and any carver who recommends it is not to be trusted.
Use a smaller, more shallow tray if
necessary. If the part of the alabaster that is being worked on needs to stay
underwater, these trays offer the highest level of effectiveness. A drip system
is another valuable tool that lets dremel users clear dirt away from the
drilling areas.
Avoid Putting Too Much Pressure On The
Stone
Learning how to carve alabaster with a dremel may seem easy enough but there are many reasons why these stones are used for a project of this nature. While there are other stones available that can be used for carving, alabaster provides the requisite softness. Harder stones are not always as easy to carve and this is especially true for beginners.
Since the alabaster is soft, the carver
must avoid the temptation to place too much pressure on the stone. There is
only a small amount of pressure that is needed. The stone needs to be warped
and shaped. Too much pressure and fissures will form that cannot be worked around.
Flaking and cracking in alabaster stone
is not always readily apparent. The dust also settles into the air while we are
working and this issue is only magnified even further when too much pressure is
placed on the stone.
Work With The Grain of the Stone
Once it is time to start carving the
stone and creating the sculpture, it is important for carvers to work with the
grain of the stone. Those who carve against the grain are increasing the
likelihood of splintering and cracking. The stone is more likely to split along
these lines.
Be sure to design the carving properly.
The grain of the stone should run along the length of what is being carved. If
the grain runs crosswise, this can cause a number of issues. Breaks and chips
are far more common in these instances. Take the time to sketch out the design
first. This keeps obvious mistakes from taking place.
Rasps Work Well
While those who are accustomed to
carving harder stones will not typically recommend the usage of rasps, these
tools are best used for the softer stones out there. Learning how to carve
alabaster with a dremel is all about putting yourself in the best possible
position to succeed.
Carving alabaster with a dremel does not always allow carvers to remove materials as desired. This is where the rasps come into play. They provide the assistance that hammers and chisels cannot. These tools are useful on harder stones but when it comes to alabaster, they only cause more chips and cracks. This is something that a lot of people do not realize about carving alabaster with a Dremel.
A Helpful Primer on Filing
Once the desired shape of the carving
project has been obtained, it is time to consider the finer points of filing.
If there are any gouges that have been left behind by the rasps (or any chisels
that were used), now is the time to remove them completely. The filing process
is what allows us to avoid a long and drawn out polishing process.
Sandpaper can provide the necessary
assistance but filing keeps us from having to spend too much time and money on
this step. This is your chance to add in all of the fine details that will set
your finished product apart. Sandpaper is crucial but it should never take
precedence over filing.
Use Dry Sandpaper When Polishing
The softness of alabaster can make the
polishing process much more difficult than we imagine. Start with a coarser
sandpaper before moving onto something different. The rough form of the carving
should already be established. This is simply the carver’s chance to properly
define it.
Medium grit sandpaper and maximum grit
sandpaper can be used once the coarser sandpaper has taken care of the tougher
parts of the job. This is the best way to bring out the natural patterns of the
alabaster and will really allow your colors to pop.
Enhancing Your Final Polish
Alabaster’s softness is what allows the
carver to apply final polishes that are designed to bring out the stone’s
natural luster. Make sure that the stone is fully dry before applying a final polish.
This is how deeper scratches are found. These scratches cannot be removed once
the carving project has been completed so be sure to take a closer look.
Bee’s wax and linseed oil can be used
for this step. Use a soft, dry cloth to rub the wax or oil into the structure.
Depending on the quality of the stone and how well the previous steps have been
followed, it may take the carver two or three applications to achieve the
desired result.
The process of learning how to carve alabaster with a dremel is easier than most realize. While there are various nuances to projects of this nature, those who take the time to follow the aforementioned tips and pointers will get the most out of their project. It is also in your best interests to find the best prices for all tools and equipment, such as the dremel tools reviewed here which are available on Amazon.com
Welcome to my guide on how to shape gemstones with a Dremel ! I hope you learn some useful tips and tricks here.
The carving of gemstones is an art that dates back for several generations. However, there are many would be carvers in the present day who are not aware of the intricacies of the process. Thanks to this helpful guide, those who are unfamiliar with the ins and outs of shaping gemstones with a Dremel tool will receive all the help that they need.
Now that technological advances have
been made and there are new tools used to carry out these tasks, shaping
gemstones has never been simpler. The process is easy, even when the designs
are considered to be complex. The following steps must be taken, so that the
gemstone is carved with the correct level of accuracy.
It all starts with the proper preparation and keen study of each material’s properties. Carvers must be willing to take their time in this regard. That’s why the Dremel tool is so crucial. It will maximize the accuracy of the design, in addition to the carver’s level of precision.
Those who learn the intricacies of the
Dremel will experience a greater level of success than those who are still
relying on a chisel and a hammer. While the hammer and chisel based techniques
may provide similar results, the process is going to take much longer to
complete.
To find out more about the steps that
need to be taken to shape gemstones with a Dremel tool, be sure to read on….
Step 1: Collection of Tools and Materials
The Dremel comes with a wide range of different diamond tips. Make sure to use the tips that best align with the task at hand. These tips are a part of the packaging for the Dremel and if they are not included, this is a sign that the carver needs to head back to the drawing board. Find the best Dremel at different price ranges here in this post, where I review several different dremel tools.
Once the Dremel and the tips have been
prepared, it is time to get the work station ready. A small tower and a glass
of water are going to be needed. A workbench is required and all carvers are
required to keep their eyes protected. Safety glasses are an absolute must and
this is non negotiable.
Step 2: Preparing The Working Area
The working area is going to play a major role in the success of any gemstone carving project. We must place ourselves in a position to succeed. Since this is a form of manual labor, we must take the time to prepare. Body posture is everything. Any work space that causes us to crouch or bend ourselves into uncomfortable positions should not be used.
The workbench should be set up in a way
that encourages lots and lots of legroom. No twisting should be taking place.
The bench needs to be positioned in a way that allows the carver to move around
the gemstone with relative ease. Every material that is going to be used must
be close by.
This allows the carver to avoid any
confusion. Confusion causes carvers to make questionable decisions that will
cause issues during the latter steps of the process. Concentration cannot and
should not be disrupted. The safety glasses need to be worn during all steps as
well. This keeps debris from having a chance to reach the carver’s face or
their eyes.
Step 3: Examining The Stones
The stone (or stones) that are going to
be carved have to be examined once the work station is prepared. Run your
fingers along the gemstone. This is how the grain is determined. A carver
should always be cutting with the grain, as opposed to going against it. The
grain will typically run along the gemstone and this serves as a natural guide.
Meanwhile, those who elect to cut across
the different grains of the gemstone are placing themselves in a very difficult
position. This style of cutting leads to more cracks and splits. Take the time
to examine each and every piece. Each gemstone comes with its own unique
patterns. Don’t make the mistake of assuming that every gemstone is one and the
same.
Step 4: Preparing To Carve
For best results, you should be creating
an outline or a sketch of the intended design. This gives you a helpful guide
to use during the carving process. This is not a step of the process that can
be skipped and getting the results that you are after is all about taking these
necessary steps.
The accuracy of the final product is all
about the steps that are taken beforehand. An outline is essential. Don’t rush
to craft a design. Otherwise, you will risk breaking the gemstone. The Dremel
tool preserves your level of accuracy but you must be willing to work smarter,
not harder.
For starters, do not work too quickly
when you are in the preparation process. Carve the gemstone piece by piece.
This keeps breakage from happening.
Step 5: Use The Proper Carving Techniques
The carving of the gemstone is deceptively simple. There are a wide range of carvers who will work rapidly but this is not the best technique. Even those who consider themselves to be intermediate or even expert carvers need to slow down and take their time. Learning how shape gemstones with a Dremel requires your patience and close attention to detail.
One of the more common mistakes that is
made during the carving process has to do with the edges of the gemstone.
Carvers often decide to start the process at the edges, due to the fact that it
seems like the simplest step to take. On the other hand, this method only
serves to increase the risks that are associated with cracking and splitting.
Those who work too quickly are also
placing themselves behind the proverbial eight ball. If you are working
rapidly, you will have never have the ability to correct mistakes as they occur.
Chipping in the wrong direction is an easy mistake to make and the chances are
increased when we are working too speedily.
Step 6: Pre-forming The Stone
Before cutting begins in earnest, it is important for the stone to be pre-formed. This is when the carver will form the gemstone into a particular shape and it is a step that cannot be skipped for any reason. When the pre-forming process is taking place, there are a few things that need to be considered.
Colored spots, hard areas and cleavage
must be taken into account during this step. The stone also needs to be carved
into a shape that is easy to use. The shape of the gemstone might not be
totally perfect but this is your chance to get as close as you can.
The glass of water is also going to be
used during this step. Cooling the gemstone is important. The shape is not
always perfect during this step but the gemstone naturally heats up. The water
needs to be close by, so that the carver can avoid cracks and splits that take
place when the gemstone starts to heat up.
Step 7: The Importance of Sanding
Sandpaper needs to be obtained for best
results and experts recommend the usage of silicon carbide sandpaper. For a
faster smoothing process, the sandpaper should also be coarse. Sandpaper that
is not coarse will not be as useful. The coarser the sandpaper, the easier it
is for the finished product to finally emerge.
The rough spots that are clearly
excessive are the ones that should be taken care of first. Once these spots are
fully taken care of, it is time to go back to the remainder of the piece and
work on the less obvious spots. This method creates a finished product that we
can be truly proud of.
Step 8: Further Polishing
The Dremel tool’s lowest grit level
should be attached before this step is taken on. Use the Dremel tool to grind
the surface down to the acceptable level. This is your chance to work on the
rougher edges that you were advised to avoid during the aforementioned steps.
Use the Dremel tool at a flatter angle to avoid creating any further
imperfections.
Once you have been able to grind away the rougher edges that are more obvious to the naked eye, it is time to switch out the bit. The finer Dremel bits need to be utilized for the additional polishing. The crown facets are trimmed down more easily and the finer bits create a more nuanced finish. These techniques are not learned by most people when they first learn how to shape gemstones with a Dremel tool.
The polishing is not going to take place
on the gemstone’s whole. Instead, the carver will want to make sure that they
are using the proper bits for the task. A soft cloth and an oxidized solution
can also be used in these instances by carvers who are looking to cut the best
gemstone possible.
The oxidized solution allows the
gemstone to sparkle more than ever before. The imperfections that are still
present after the polishing takes place are removed from the equation entirely.
The cutting process is not always perfect. Having an oxidized solution and a
soft cloth on hand is a great way to remove these imperfections and have your
gemstones looking their absolute best.
Are There Any Additional Tips To Consider?
Before we wrap things up here, we are also going to pass along a few additional tips that are designed to make the carving process even easier. Learning how to shape gemstones with a Dremel tool is all about being willing to accept all advice. Let’s take a closer look at the additional tips that need to be considered. These pointers are here to make your life easier when it comes to take on a project of this magnitude.
Change The Dremel Bits Regularly
While we have discussed the importance
of this step above, it bears repeating. The same Dremel bits should never be
used for each step of the process. The stone is not going to have the same
level of hardness all around. That is why the carver needs to take the time to
analyze the stone.
This lets us know which Dremel bits
should be used for each area of the stone. Every bit is specifically designed
to assist carvers with different levels of hardness. Those who allow themselves
to lose sight of this fact are placing themselves in a more challenging
position. Cracks and splits are far more likely when the carver is not able to
swap out Dremel bits as necessary.
Use The Right Marker For Drawing Designs
Some carvers may decide that they would
like to draw designs on the actual gemstone, so that they are able to use these
markings as a helpful guide. A fine tip marker is the top choice in these
instances. The markings can be removed with the usage of rubbing alcohol. The
aforementioned oxidized solution is also a great way to remove the markings
once carving is complete.
Beware once the markings are completed. Once the Dremel tool is switched on, there is very little room for error. The faster the speed, the deeper the cuts. Take the time to make sure that the markings indicate how deep the cuts should be. Don’t make the mistake of trying to figure this part of the process out on the fly. Have patience and caution when learning how to shape gemstones with a Dremel and you will make steady progress.
The cuts will become too deep and lead
to cracking and splitting that cannot be remedied. Drag the tip over the
markings as gently as possible. The tip should be dragged in a way that clearly
leaves a mark without causing any additional splintering. Don’t stop in one
area for an extended period. Use the towel to wipe away the shavings as needed.
Utilizing The Correct Angles
The utilization of the correct angles is
one of the reasons why your workbench placement is so crucial. If you are
looking to produce the smoothest carvings possible (and who isn’t?), you must
carve at a 45 degree angle. If the setup of the workbench or working area does
not allow you to carve at a 45 degree angle with minimal difficulty, this is a
sign that you need to make changes before beginning in earnest.
Using the tip at a straight angle is
almost never recommended. These angles are okay if you are looking to create a rough
outline but they are not helpful for the finished product. The desired shapes
and shadings are created during the rough outline stages and a larger Dremel
tip may be needed in these instances.
Otherwise, a grinding tip is the best
bet. Once the outline phase is completed, you will not want to cut the stone
too deeply. We would also like to take this time to offer an additional warning
about wearing the proper safety gear. Do not ever allow your body to be placed
in harm’s way. If your posture is being affected in an adverse manner, this is
another sign that your work station is not up to par.
Experiment With Cheaper Stones If Needed
Is this your first gemstone shaping
project? If so, you may want to make sure that you are making all the
beginners’ mistakes on stones that are not as valuable. Using the Dremel tool
on expensive stones without taking the time to learn all of the basics first is
not recommended.
Purchase some inexpensive gemstones to start with. This gives the carver a chance to learn how to shape gemstones with a Dremel, without having to worry about the potential destruction of expensive gemstones. River stones are usually recommended in these instances. They do not require any sort of upfront payment and the carver is able to work all of the kinks out before shaping more precious gemstones.
Pay Close Attention To Detail
Since the Dremel bits offer a wide range of uses, the best carvers are able to use this tool to craft the gemstone of their dreams. Taking your time and paying attention to detail is crucial when learning how to shape gemstones with a Dremel. Otherwise, you risk causing cracks and splits to potentially take place.
Once these cracks and splits occur,
there is no coming back from them. Avoiding these types of issues in the first
place is key. The cuts that are used for a jade gemstone are not going to be
the same cuts that are used for an emerald. Meanwhile, there are no two
emeralds that are exactly alike.
This analogy may be a bit overused but
when it comes to gemstones, they are much like snowflakes. No two stones will
ever be exactly the same. It behooves a carver to take their time and examine
every nook and cranny. Some stones might be more durable than others.
A gemstone is usually hard to destroy
but that does not mean that it should be treated as if it is indestructible.
Creativity and precision must go hand in hand when a gemstone is being shaped.
Sit up straight, so that all backaches and neck aches are more easily
avoidable.
Conclusion
Not only are most gemstones durable but
they are also easy to acquire without placing a major strain on your budget.
Projects of this nature are also a great way for various carvers to learn more
about the individual characteristics of each stone that they are choosing.
These materials last for a long period
of time when the carver is truly careful during the shaping process. Those who
work quickly might be able to complete more projects in a shorter period of
time. However, the quality of the carving and shaping that is taking place is
not always up to the level where it needs to be.
Whether you are looking to craft your
own unique jewelry or you are looking to take on a project that is a bit more
complex, there is no substitute for the Dremel tool. This tool offers the
necessary precision to all those who are seeking additional assistance with a task
of this nature. Taking the time to learn as much as possible puts you in a more
advantageous position.
Gemstones that have been shaped with the usage of a Dremel tool are always going to maintain their value. Learning how to use a tool of this nature without making the same sort of mistakes that plague so many others is crucial to long term success. Knowing how to shape gemstones with a Dremel is a valuable skill. A Dremel is the best tool when you are looking to maximize your creativity and ensure total precision. See my recommended Dremel tools for every budget, from low cost to high cost here in this post.
If you are a DIY enthusiast and throwing away your wasted glass pieces, you are wasting quite important material for your next DIY project. Yes, you can turn the natural or manufactured sea glass or the broken glasses pieces at your home into a beautiful resin window. As this article talks about how to make sea glass resin windows using common material, let’s get straight to the point. And trust me, you will find most of the things required for this DIY project at home
Step 1: Gather the Required Material
The first step is to gather all the glass pieces you can find and arrange them per size, color, and type. Also, you can buy manufactured sea glass specifically made for home décor from Amazon or at a craft store near you. Having different colors to make prominent contrasts in the resin window is worth doing.
Step 2: Get a Window or Picture Frame
Though you can use any idle picture frame or window from home, if you are looking forward to gifting this resin window to someone, buying a new window from the market is better. A new window will give a more professional look to the resin window.
You can either get a real window or a float frame – totally your choice.
Step 3: Get Creative with Designs
Now lay down the window frame horizontally and start practicing with some designs on the glass. This step is more like a puzzle and you must get creative to find the perfect design using different colors.
Step 4: Glue the Design
Once you have finalized the design, start applying glue to the sea glass pieces. Be careful because you may end up rearranging the sea glass pieces into something else. Thus, try to be patient and keep track of consistency for the best results. You can use a glue gun for better results, this is a pro tip on how to make sea glass resin windows. Note that you just need to apply a little bit of glue to keep the pieces intact per the design.
Step 5: Apply Resin
Put the UV Stable Resin and hardener in a disposable cup and stir it for a few minutes. After this, put the solution into another cup and stir it again to get a uniform resin solution. Pour the solution on the window and use a spoon to place it uniformly all around the frame. You can also use a brush to spread it until the corners and edges.
Final Piece
After uniformly spreading the resin around the frame, wait for 20-30 minutes and sprinkle some glitter to complement the sea glass window design. To get little bubbles popping out of the frame, heat the window with a lighter.
Make sure the lighter stays a few inches away from the frame. Place the window or frame in a warm place and leave to cure the resin completely – maybe overnight. And that’s it! We are done making a sea glass resin window. It was fun, wasn’t it? Now you can tell all your friends and family that you are an expert on how to make sea glass resin windows !
How to Make Resin Window Art
Making a resin window art is certainly one of the most fun yet an interesting DIY project. Not to mention, it is also a matter of a few hours to get it ready. If you are a DIY enthusiast and your to-do project list is over, for now, try making a resin window for the home interior decoration. Let’s not waste any more time and get started with this DIY resin window art already.
Step 1: Find the Windows
If you are reading this guide, there are greater chances that you have a spare window at your place and you are looking for an ideal way to make use of it. Well, you have landed in the right place. However, you can also buy a window frame from the market.
Step 2: Required Material
Before getting started, make sure to gather the following things to make a resin window art without getting stuck in the procedure due to a missing thing.
Decorative pieces i.e. anything you’d like to create an art.
Paintbrush
Fancy Rope for Hanging
Cups and stirrer
Step 3: Define the Art
The very first step is to define the art goals. How will you turn a simple window into art?
If you’re a great artist, you can draw beautiful things on paper, color them, and cut them to use in the resin window art. But if you don’t get along with drawing, try using decorative pieces to embed into the resin window i.e. sea glass, shells, and beautiful stones.
Step 5: Pouring the Resin
Place the glass window on a leveled surface and paste the art pieces on the window glass using glue. Take a disposable cup and mix the hardener and resin. Stir the solution for at least 5 minutes and then pour it in another cup. Now stir again for 1-2 minutes and gently pour the resin solution on the window glass.
Step 6: Uniformly Spread the Resin
Use a paintbrush to uniformly spread the resin solution to all parts of the window. Try to be gentle and consistent and do not mess with the art. Many people end up screwing up the art pieces by putting more pressure than is necessary. After the resin is uniformly pasted on all parts of the window, leave it for a few minutes to dry.
Step 7: Final Art Piece
To further enhance the resin window art, you can make use of some glitter around the art and letters. It will give a more realistic look to the art. If the bubbles are popping out of the resin, place the lighter a few inches away from the window and heat it for a few seconds.
Congratulations! The final art piece is ready. You can now insert the eye bolts on each side of the window and hang it at your favorite place using a fancy rope. Good luck in crafting the best DIY project of this year, and pat yourself on the back for learning how to make sea glass resin windows.
How To Set Sea Glass In Resin
Isn’t it fascinating that most of the trash unintentionally thrown into the sea can turn into beautiful pieces of art?
If you are a DIY enthusiast and looking forward to making beautiful crafts for interior decoration, then you’ve come to the right place. Sea glass is made with years of tumbling and crumbling in the sea sand and waves that give useless pieces of glass a frosty finish.
Though original, authentic sea glass is hard to find these days, you may find useable sea glass pieces on Amazon or at any craft or stationery shop near you. Yes! Manufactured sea glass is trending these days to be used in home interior décor i.e. tables,windows, and crockery.
Set Sea Glass in Resin
You will find hordes of information about using sea glass for making windows and other décor items, but not much about setting sea glass in resin. Here is a step-by-step guide to set sea glass inresin to make an ideal décor item.
Gather Glass Bottles
Collect all useless glass bottles at your house and clean them thoroughly. Let them dry and put them in a cardboard box. You can also cover the bottles in a towel or any thick cloth. Smash the bottles using a hammer. After breaking them into pieces, place them into the kiln at 1500 degrees.
Get a Window Pane or Frame
Get a picture frame or window and clean it to get off any paint or dust. You can utilize light sand to take off any dust or paint. In case of the picture frame,take the back off and use a clear chalk on the glass. After cleaning hte frame, start placing your desired design within the frame using a glue.
Let the window or picture frame dry to proceed. Preferably, place the window in a warm place and leave it for at least 24 hours.
Apply Resin to Get the Final Piece
Now get a UV stable resin and apply it to the window frame on the decorative pieces. The reason why we are using a UV stable resin is that it will prevent the window or picture frame to turn yellow if exposed to the direct sunlight.
Make sure to keep the window horizontally on a smooth yet leveled surface when pouring the resin on the sea glass pieces. You can also a spoon, knife, or any other tool to uniformly level the resin to all parts of the frame.
Final verdict
DIY projects are fun, aren’t they? Not only do you get to spend your idle time, but you also get to explore the creative person inside you. Make sure to gather the required material like glass bottles, window or picture frame, glue, UV stable resin, and other necessary items before getting started with the project. If utilized correctly, everything will become an attractive product to draw the attention of guests or visitors at your home or office for many years to come.
How To Make A Sea Glass Resin Suncatcher
Resin crafts can be the best items for interior décor or gifts showcasing your effort for the loved ones. If you’re obsessed with beautiful yet natural colors of nature, a resin suncatcher is an ideal choice to pleasure you on a sunny warm day.
To be honest, getting started with the sea glass resin suncatcher isn’t as difficult as it may seem. There is a small list of the required materials and you’re good to get started to make a resin suncatcher at home. Before wasting any more time, let’s get started with making a sea glass resin suncatcher.
Any metallic lid will do the job. However,choosing plastic material is better. Make sure to apply the mold release conditioner to prepare the pan for the next step.
Prepare the Resin
Though you can use any clear casting resin, we used the Clear Casting and Coating Epoxy Resin for this project. Make sure to keep everything ready before preparing the desired resin to add to the pan. Now start mixing the resin and hardener to get a uniformly moderate mixture.
Mix the Resin Thoroughly
Keep mixing the solution for a few minutes and keep scraping the sides, bottoms, and surface of the cup. Then pour the solution into another cup and again stir for 2-3 minutes. After thoroughly mixing the solution, it is ready to be poured in the plastic pan or metallic lid.
Pouring the Solution
Pour the resin into the metallic lid or plastic pan about halfway up and leave it for about 15-25 minutes. After it starts to thicken, start placing the sea glass pieces in the pan.
Sea Glass
You can use the manufactured sea glass available at Amazon or most craft and stationery shops or make the sea glass at home from idle glass bottles. To get a professional yet attractive look, it is recommended to only use the manufactured sea glass.
After you have placed a considerate amount of sea glass pieces on the resin solution, start making another solution of the hardened resin using the same steps as explained earlier. Now pour another layer of the resin on top of the sea glass.
Let it Dry
Leave the plastic pan or metallic lid until the resin is completely cured. The next step is to get the sea glass suncatcher out of the lid or pan.
If you used a plastic pan, it shouldn’t be a problem getting it out. Simply put some pressure at the bottom and it will pop out. In case of the metallic lid, place the lid in the freezer for a few minutes and it will come out of the lid with little to no struggle at all.
Congratulations! The final product is ready. You can now hang this resin suncatcher using a fancy thread or rope and place it anywhere near the sunlight.
So you’ve decided to start sculpting ? Go figure! Sculpting miniatures is quite an interesting field and a lot of fun.
However, you will definitely need some sense of imagination and love for action figures, at the very least, and if you enjoy getting better at something, even better. But you need not worry, you’ve come to the right place to learn some helpful pointers.
Before we get started, you need to ask yourself this; what type of miniature do you want to make ? Afterward, you can proceed and start with your handy work.
In this article, therefore, I will give you a brief description on how to sculpt miniatures. More than that, I will provide you with any other relevant information that might help you get the best design.
How To Sculpt Miniatures
To get the right miniature, you will need to put in some effort and spend time on the idea. Additionally, for your design to have that “close to perfect” touch, you will have to practice.
As you are just getting started on sculpting, it’s probably a good idea if you work on creating dwarves first. That’s if you want to make figures.
An average of 1 to 6 inches is the perfect size for a figure. You will need to get used to the craft and obviously, that means you need to practice.
But today is your lucky day. This article will not only teach you how to sculpt miniatures but will also give you the required practice.
The best part is that I will not start you off with those expensive materials you need to make your art. Instead, we’ll start off with clay. And if you are planning to sell your model, you will have to find out how many such models have been sold in the past.
Also, what are the major reasons why some people who have tried making such miniatures have failed ? All this will help get a better experience on your art.
Getting Started
Simply start with your imagination. Are you trying to make an action figure or just something simple ? Either way, you need to have a clear image of what you’re about to make.
Second, try making a clay curvature of your miniature. Like I said earlier, miniatures are about 1 to 6 inches in size. Keep on trying until you get the right shape. This will give you the exposure you need. At the same time, you will come up with smarter and faster ways to get the job done. Now you can spend time buying the required materials to go commercial with your business.
At this point, you have two choices; you can either choose to make a miniature for your own collection or chose to make an extra buck or 2 with your newly acquired talent. Regardless, you will need proper materials to make this happen.
Tools To Get For Sculpting Miniatures
Color Shaping Tools
These tools can be found in most art supply stores. With these tools, you will be able to control the shapes of different paper clays, epoxy, and polymer clays. More importantly, you can use these tools to move any moistened paper to fill tiny gaps. Even when repairing your miniatures, you can use these tools.
There is a wide range of shapes, tip styles and firmness of these tools. Therefore you need to make sure what you need before buying them. The best part is that they offer a wide range of uses. I guarantee you, every color shaping tool is important to your craft.
Loop Tools
For any beginner, you will need these loop tools. They are narrow metal loops that you can use to smoothen curves or corners. You can also use it to create texture or patterns. Additionally, these loops can be used to level up materials across a specific area. That is because the looped blades can rest on any raised region as you fill the material on the lower gaps of your art.
Rolling pin
This is useful when it comes to making miniatures using paper clay, polymer clay or any other clay material. If you are on a tight budget or you simply can’t find the right rolling pin, then a plastic supply house is all you need. This will help you get the proper shapes for different crafts. It also comes with a glass board where you can do all your rolling.
Clay Modelling tools
These are wooden tools that will help you get the best out of your work. They are also available online or from craft suppliers. These tools are useful when you need to create curves on your models or creating that smooth edge. In a three-dimensional shape, you will be able to control curves and cut lines in any model material.
Flexible Blade Knife
This is an amazing blade that will help you create a great curvature on your model. The blade is great when you want to make a slice through your polymer clay. They also work well in scoring lines for your tiles. It can also work well with any miniature of your choice.
Making Your Miniature
Now that you have all the materials and the imagination, then let’s get to the interesting part. Get the drawing on paper by using a pencil. This will help you have a clear picture of your miniature before you start. I recommend you create lots of different drawings to help you get a clear anatomical view.
Then, make a sketch of the miniature using a wire. Call it a skeleton of your final copy. Afterward, you can use this to mount your miniature as you attain a more stable figure. This sculpture will give you the chance to continue practicing your skills as you get better at your work.
Finally, you need to make a serious sculpture using ProCreate and a good stylus pen in order to have that fine small miniature which you have already seen in your mind`s eye. Use modern tools and technology so that you can make your miniature have more detail and style. It will make a huge difference that you and others will clearly see.
Final Verdict
In conclusion, I hope you now have a better understanding of how to make that perfect miniature which originates from your own imagination. Stay tuned for more tips on sculpting miniatures and other sculpture projects.
This is my blog where I share tips, tricks and info about DIY crafts that I have already learned.. OR.. as I learn them. I enjoy helping others to learn about this great hobby. Oh… and by the way, my husband Tom also loves making clay pottery, home made sculptures, etc. and doing some writing here too.
As an Amazon Associate I earn from qualifying purchases.
The owner of this blog is a participant in the Amazon Services LLC Associates Program, an affiliate advertising program designed to provide a means for sites to earn advertising fees by advertising and linking to Amazon properties including, but not limited to, amazon.com, endless.com, myhabit.com, smallparts.com, or amazonwireless.com
The owner of this blog also participates in affiliate programs with Clickbank, CJ, ShareASale, and other sites. The owner of this blog is compensated for referring traffic and business to these companies.